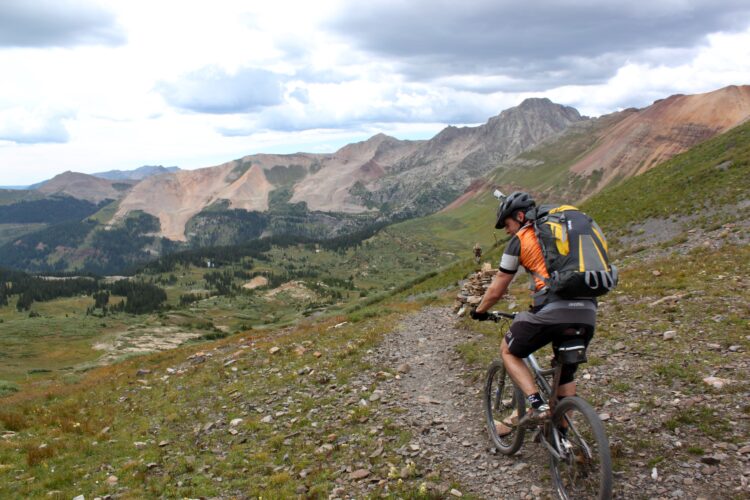
I’ve done most types of camping over the years, though still not all. It started when I was a kid, in the Boy Scouts, almost 30 years ago now. There’s something about getting away from daily life, putting the phone and computer away, and sleeping under something that’s not the roof of your house. It didn’t start quite that way; most 10-year-olds don’t have a full email inbox to respond to, but for me it’s always been about the adventure and the outdoors, and it still is. It’s something I try to do frequently throughout the year to recharge my soul, and as a way to facilitate my mountain bike adventures.
The problem is, camping is always a compromise of some sort. Whether it’s ground tent, roof tent, van, RV, or trailer, there’s always a trade-off to be made somewhere. Maybe it’s comfort, convenience, cost or something else. In early 2022 I found myself wanting to pursue the idea of the teardrop trailer. For those unacquainted, a teardrop trailer is a tiny, lightweight trailer that can be towed by almost anything. This struck a chord with me because it can be detached from the tow vehicle and left set up at camp for day adventures or shuttles. It doesn’t hinder your daily driver or cost a lot in maintenance or insurance, and can be parked in a small parking spot when not in use. Most importantly though, it’s comfy enough for a great night’s sleep but small and basic enough to still feel like camping good and proper. This is my story of how I built my own overland-style ‘squaredrop’ trailer from scratch.

How I built my camping adventure trailer
Building a trailer might seem like a daunting task, but there’s a thriving online community around these things, with no lack of information available and pretty much everything having been done more than once by many different people. My budget was tight-ish, which is the main reason I chose to the self-build. I figured I could build myself a $25K trailer for less than half that since labor accounts for a significant portion of anything like this. Having done enough research to be dangerous, I decided that the best way to proceed was to buy a trailer frame to force myself on with the project. I bought a used utility trailer as my base and cut the sides off so that I had a simple flat, 5x8ft deck to build my trailer body on.
They say that the best way to learn something is to do it wrong first because if you do it right first time, you haven’t learned anything at all, you just did it. Jumping into projects and figuring them out as I go is my preferred method; inevitably I do things wrong, and as a result, a lot of learning transpires. As it happens, I ended up learning a lot about trailer axles and wheels; I wound up having to buy a new custom made axle and wheels, because the wheels/axle my trailer came with were an old Dayton type that weren’t compatible with most modern tires. Following some research around weight distribution I also determined that the axle needed to move back about 12 inches and so I needed a fab shop move the leaf spring brackets back on the frame. It’s safe to say I learned plenty – if there’s ever a next time around I’ll design and build the frame from scratch to my own specs.

While I was waiting for the fab shop to work on the frame, I started on the build of the body, framing out all the walls so I could assemble them on the frame once I had that back. I decided to go with a ‘squaredrop’ type design because it seemed simpler working with angles than with curves. The body was to be 8ft long and 5ft wide, with the main sleeping cabin 6x5ft minus the thickness of the walls. It worked out to be about the size of a queen bed – the entire floor would be taken up with a custom mattress, with some cupboards up top for storage, electrics etc. That would leave about 16″ of space at the back for a galley kitchen to open up with a tailgate type hatch.
I sourced a window and door for the trailer first so I could cut the openings for these in the panels ahead of time and reinforce appropriately. While I considered making a door myself, I chose to order one which turned out to be a good decision as it looks much less DIY and it saved me a ton of time. The wall panels were constructed with 2×2 batons with 1/2″ plywood skin on the outside, and 1/4″ plywood on the inside with 1.5″ insulation panels sandwiched between. The floor was constructed the same way but with 3/4″ plywood either side, for strength and rigidity.
Remember what I said about making mistakes? Have you ever installed a tire backward despite being 100% sure that you checked it was in the correct orientation? Well, I ordered the door to open the correct way on the passenger side of the trailer, as most RVs do. While building the sides I checked and double checked that I’d put the door on the correct side of the trailer, only to find out that I’d framed them out backwards, and that my only options now that I’d glued and screwed them together were to either commit to the door being on the wrong side and opening the wrong way, or to rebuild the sides, wasting hundreds of dollars of wood. I opted to accept my fate and leave it as it was – a valuable reminder.


Once I had the frame back, I could assemble the body panels and bolt them down. I designed the floor with captive nuts so that should I ever need to remove the body from the frame, I could. This did later turn out to be a good idea when I needed to re-waterproof the base of the shell. Once assembled, I filled gaps with body filler, and fiberglass over top. The wood needed a waterproof layer for obvious reasons and resin on its own is not strong enough around the seams. So fiberglass was the ticket.
This would make the shell ultra stiff, though this meant I could likely have used much thinner/cheaper/lighter wood. I then finished with truck bed liner, since the resin is not UV-stable without some kind of paint. Black bed liner gave me the industrial type of look I wanted and meant there was no real need to smooth out the fiberglass finish. The lesson I learned from applying fiberglass: it’s deeply unpleasant, especially in a small garage in the middle of summer.
Once together I could run the wiring, finish the interior and it’s good to go, right? Turns out all of the seemingly minor details took much more time than anticipated, as is always the case. The smaller, more intricate work in the cabinets etc. required a lot more finesse and time to get it right, especially in the fit and finish. I ended up rushing things somewhat to get it finished up as I had a trip planned with my parents, but I got it to a place where I was happy with the end result.


I decided that instead of a complex leisure battery system with breakers, inverter, solar charge controller etc. I would run a Bluetti EB55 portable power station since this has all of those things built in. From there I run all of my electrics off the 12v out to a small fuse board. It has the capability to charge a laptop and other electronics but is mostly for running LED lights and a fan so it doesn’t need a huge capacity. It also can be easily removed for use elsewhere like for tent camping trips or anything else outdoors. On top of the trailer is a 100w solar panel for charging which, through summer, keeps the battery 100% topped up all the time, though it’s a little less helpful in winter.
Cut to late August 2022. I got the trailer finished in time for our trip to the Rockies, but just barely. Its maiden voyage ended up being a 1600km round trip, sans bikes. Thankfully it towed great and everything worked well with few incidents aside from some spilled water containers. Total build time was about 4-5 months around a full time job, and I spent around $10,000CAD building it. The final weight is around 1,700lb – heavier than many other small trailers, but I feel confident in its construction, though I would build the next one lighter given the chance.

Getting something like this completely dialled for bike trips can always be tricky, I had a 2″ hitch receiver welded onto the back of the trailer so I could attach my North Shore Rack, but it had more flex in the receiver than I would have liked, so I decided to find a different way to carry bikes. Aside from this, having the bike rack on the back of the trailer would have added yet more length to what I had hoped would be a fairly compact setup, as well as meaning I wouldn’t be able to open the galley hatch with bikes loaded. I opted instead for two Küat Trio racks on the roof, so I can carry bikes on my SUV and use it as a shuttle vehicle still. And of course if anyone else brings a North Shore Rack camping, I can shuttle multiple bikes and 5 humans while everyone else leaves camp set up.
Camping with my custom trailer
Having had the trailer completed for a year now, there are things I’d do differently and things I’m happy I did the first time around. But mostly, I confirmed my theory that there’s no perfect camping setup. It’s always fun going camping with friends and seeing what their setup is like. Maybe it’s a rooftop tent, ground tent, big van, small van, or something else. The trailer does what I wanted it to do; I have a supremely comfortable bed and I sleep like a log. It has just enough creature comforts while still feeling like I’m camping, and I can detach the tow vehicle to run errands, drive to the trailhead etc, and it goes off road, or as much as I need it to anyway.


The trailer does have its downfalls however, and they’re not insignificant. Having never towed before, taking the trailer on its first trip was a trial by fire for me. Towing a trailer is no joke. You have to be a lot more aware while towing, especially at slow speeds and in tight situations. Turning it around requires a good deal of room, and some legit driving skills. To that end, I find myself apprehensive to take it down roads or into situations where I don’t know if there’s a good spot to turn around like a parking lot or a narrow forest road. A flat parking lot is the best case scenario, where it can be turned around by hand with one person. It’s inconvenient, yes, but do-able.
Finding myself at the bottom of a steep and narrow FSR with no turn-around and no way out except back the way I came is worst case scenario, and one I haven’t found myself in yet. While I can unhook the trailer and leave it somewhere while I go explore, I do feel like this leads to some missed opportunities still, because unhooking and hooking back up is enough of a pain that I don’t want to do it a lot, and so that tempting road that might lead to a sweet campsite usually goes unexplored instead.
By a similar token, finding parking spots while road-tripping can be difficult, and I often have to park a good walk away from my destination. However I don’t mind this too much since the goal of the trailer is to get away from cities and situations where parking is an issue. But it can mean not being able to park with friends sometimes when in a town or somewhere parking is limited.


Finally, fuel economy is another major drawback. Since it only sleeps two people, realistically you’re usually only going to be a party of two, and with a big fuel bill to foot, it can get expensive fast. The trailer adds roughly 30% to my already expensive fuel bill on big trips, and since my partner doesn’t mountain bike I’m often towing it solo, which obviously is doubly expensive. Thankfully camping in the trailer still works out cheaper than hotels or Airbnbs most of the time, especially if you like the more basic campgrounds or boondocking, which I do. This was the aim for me. I don’t like paying for hotels, especially when I could be camping instead.
Drawbacks aside, I’m glad that I decided to build my little squaredrop trailer. If I can use it once a month spring through fall then I’m pretty happy. It gives me a ton of freedom, means I can camp just about anywhere in supreme comfort and I can go on trips at the drop of a hat if I leave it fully stocked, which I do.
One of the things I most enjoy about it is that it gets attention wherever it goes. People are curious and want to chat to me about it. Maybe they’re thinking of building their own and want to see how I did mine. Maybe they’ve just never seen one and want to know what the hell it is. Either way, these things are infectious, and the joy of using it makes me want to build another. Am I crazy? Maybe. But there’s something incredibly satisfying in building something yourself.

I love seeing other people’s solutions to the bike camping conundrum, whether simple or complex, everyone has their own idea of how to do it and their own approach. Some are minimalist, some are maximalist, but all are very specific to each individual, and I believe these things say a lot about a person through what they choose to prioritize. Please feel free to share your camping setups in the comments below, I’d love to see them.
For anyone interested in learning more about teardrop trailers, this subReddit gave me a ton of ideas, and the TNTTT forum is an almost endless resource. For anyone interested in my step-by-step build, you can find a detailed build thread here. Lastly, please feel free to follow my adventures in the trailer on instagram, and for anyone interested in renting it out in the Vancouver (BC) area, you can find my Outdoorsy listing here.

